Click Next. The Step 2: Select Documents Page will be displayed. This page shows all the documents related to the case.

Step 2: Select Documents Page
|
|
Regardless if the system has automatically added the selected document type, the user can still add documents to the list of documents to be bundled. Mark the document checkbox and then click Add Selected. The selected documents will be added to the Add Documents to Bundle list.
Perform the same if the user has selected Others in the Type of Bundle field. |
|
|
To remove the document/s from the list, mark the document and click Remove Selected. |
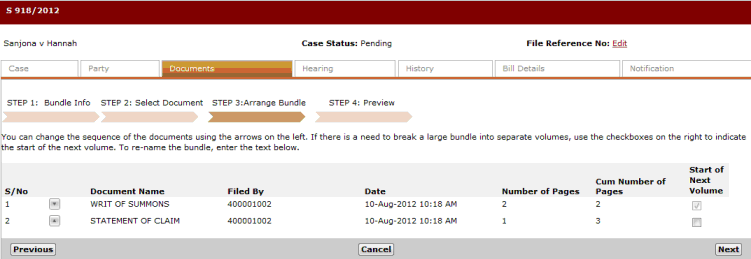
Click Next. The Step 3: Arrange Bundle Page will be displayed. This page allows the user to arrange the sequence of the documents in the bundle or break a large bundle to separate volumes.

Step 3: Arrange Bundle Page
Click the Up or Down arrows to arrange the documents in the bundle. Mark the Start of Next Volume box to start the selected document to a new volume in the bundle.
Click Next. The Step 4: Preview Page will be displayed. This page allows the user to preview the arrangement and sequence of the documents in the bundle.

Step 4: Preview Page
|
|
Click Print to print the bundle information. |
Once the documents and the arrangements are confirmed, click Confirm. The Bundle List Page will be displayed.

Bundle List
This page shows the draft bundles made by the Law Firm User.
|
|
The Status column will show the progress of the created Bundle. When it is Ready, the Download PDF link will be shown in the Action column for the user to download.
|
|
|
Click Delete to remove a draft bundle from the list. |
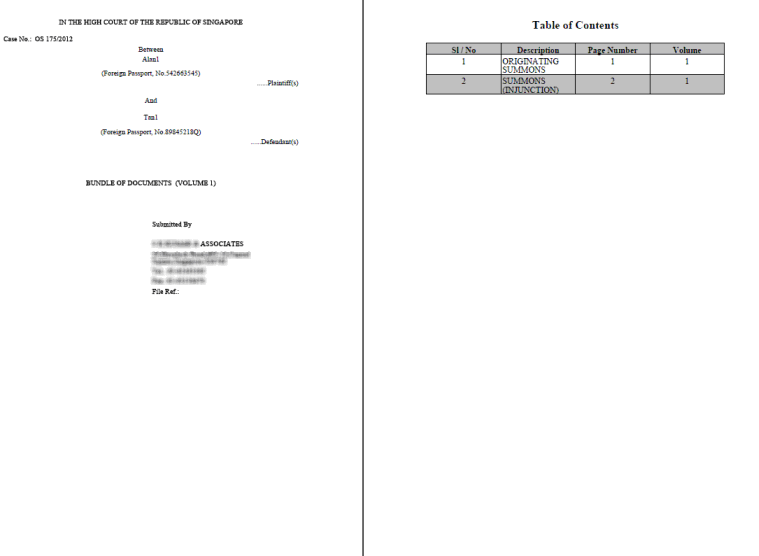
Click the Download PDF link of the created bundle and select the path where the bundle will be saved and viewed. The PDF version of the bundled documents will be displayed.

PDF Version of Created Bundle